The feature layers you shared as a feature service in Create a template allow you to sketch designs in ArcGIS GeoPlanner. When you shared the data, the ArcGIS system set properties on the feature service for enabling editing, tracking of edits, data export, and adding attachments. You can check these properties and make changes if necessary. The following workflow describes how to change some of these properties.
Enable editing, tracking of edits, and data export
You can allow your users to export data from a hosted feature layer by setting a feature layer's Export Data property. This enables users to sketch a design in a GeoPlanner scenario and download the design features in CSV, KML, file geodatabase, or shapefile format. You can also track your users' edits. This allows you to monitor who created or last updated features. To enable or disable these properties on a feature layer, complete the following steps:
- Sign in to your organizational account.
- Click Groups and choose the group you created when you created a template.
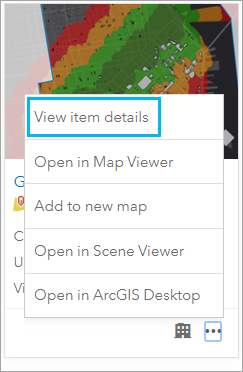
- On the group page, click the More Options button
 and click View item details under one of the feature layers you created.
- On the item details page, click Settings.
- Click Feature Layer (hosted) Settings.
- In the Feature Layer (hosted) Settings section, verify that the Enable editing check box is checked and that the Add, update, and delete features option is selected.
- Check the Keep track of who created and last updated features check box to enable tracking.
This allows you to track the edits, the person who last edited the feature, and when the feature was last edited.
Tip:
To limit editing to the user who originally created the feature, check the Editors can only edit their own features (requires tracking) check box. When this option is checked, a user cannot update or delete a feature created by another user.
- Check the Allow others to export to different formats check box to allow users to export data from this feature.
- Click Save to save your changes to the feature service.
Enable attachments to the feature service
In addition to editing a feature's geometry or attributes, users may need to attach external files to a feature. To do this, you must enable the attachment capability for the feature service.
- In the Overview section of the item details page, scroll down to the Layers section.
- Click Enable Attachments next to the feature layer's name.

- Repeat steps 1 and 2 to enable attachments for other layers.
In this workflow, you learned how to change feature service properties to track edits and enable data exports and attachments. New projects that you create from your template inherit these settings.