ArcGIS Event Editor provides the ability to use and manage web maps beyond your initial Event Editor configuration. This includes the ability to do the following:
- Load an existing Portal for ArcGIS or ArcGIS Online web map.
- Make and save changes to an existing Portal for ArcGIS or ArcGIS Online web map.
- Create a new Portal for ArcGIS or ArcGIS Online web map.
- Delete a Portal for ArcGIS or ArcGIS Online web map.

Web map management in Event Editor requires Portal for ArcGIS or ArcGIS Online security to be deployed so that your organizational web map ownership and role membership settings can be used.
Loading a web map
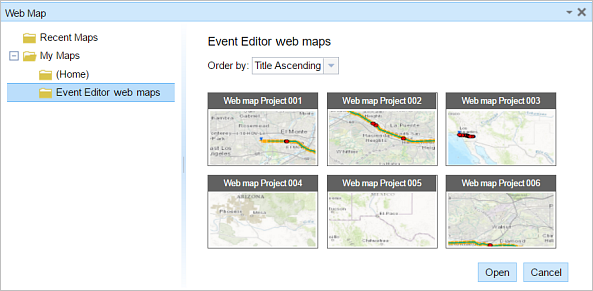
You can load any recently saved web map as well as any web map that is owned by the current signed-in user name.

- Open Event Editor and, if prompted, sign in to Portal for ArcGIS or ArcGIS Online.
- Click the Map tab.
- Click the Web Map button
 .
. Hover over a web map thumbnail to view additional information, such as the web map summary, tags, and last updated date.
- Double-click the web map you want to open.
A specific web map can also be loaded via the Event Editor smart launcher.
Saving a web map
If you are logged in to Event Editor via Portal for ArcGIS or ArcGIS Online security as the owner of the web map, you can directly save certain changes such as the following:
- The default extent of the web map that Event Editor will display upon loading
- Changes to existing bookmarks, such as extent, name, or bookmark order
- Added or removed bookmarks from the web map
- Click the Save Web Map button
 on the Map tab.
 If saving an existing web map that you own, the file will be updated. If you are not signed in as the owner of the currently loaded web map, or if you are pointing to a configuration file, you will always be prompted to save as a new web map. If saving a new web map, refer to the following section.
A confirmation message appears at the lower right once the map is saved.
Creating or saving as a new web map
You can create a new web map or save a copy of the currently loaded web map if you want to save the current state, regardless of whether any changes have been made.
- Click the arrow under the Save Web Map button and click Save As.
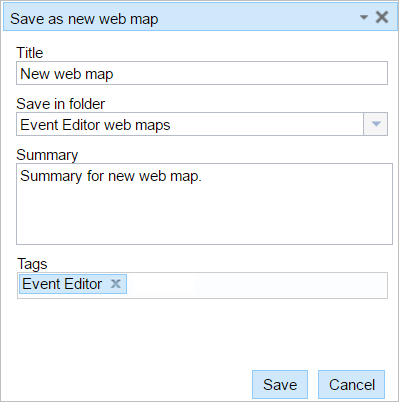
The Save as new web map dialog box appears.

- Type the name of the web map in the Title text box.
- Type the name of the folder in which to save the web map in the Save in folder text box.
If you don't type a name, the web map will be saved in your default Portal for ArcGIS or ArcGIS Online user folder. The new web map will then be created in the selected folder as an item owned by the current signed-in user name.
- Type a description of the web map in the Summary text box.
- Type at least one tag in the Tags text box.
- Click Save.
A confirmation message appears at the lower right once the map is saved.
Note:
When you save an existing web map as a new one, the geodatabase version that your Event Editor instance is pointing to does not change. This is because while you are now pointing to a different web map, your data workspace has not changed. Use your initial configuration settings or the smart launcher for Event Editor as well as ArcGIS Workflow Manager (Classic) to launch Event Editor with the desired geodatabase version.
Deleting a web map
Deleting a web map from the Event Editor list also permanently deletes the web map from Portal for ArcGIS or ArcGIS Online.
- Hover over the thumbnail in any folder other than the recent Web Maps tab, and click the Delete Web Map button
 .
. A confirmation message appears in the lower right once the map is deleted.